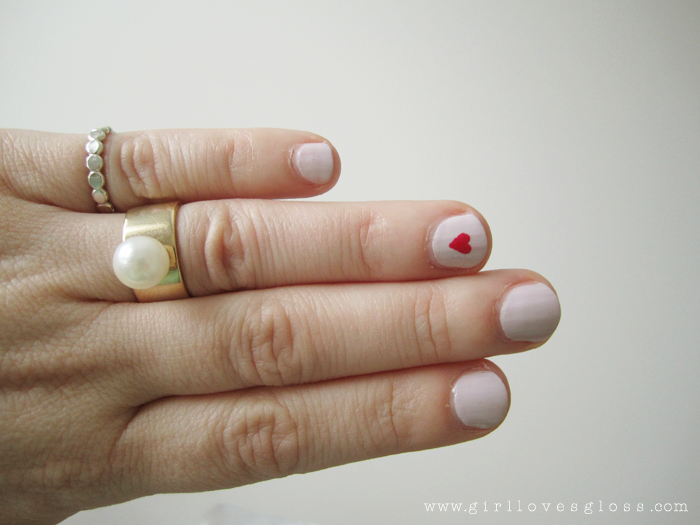
Ok, so a master of nails I am not, but I have managed to get much better than years past at painting my short little nails. I thought it might be fun to try something new on the blog and do a basic Valentine's Day nail tutorial on how I got my little heart accent nail in the main picture.

WHAT YOU WILL NEED:
- Your favourite base coat. I'm using Perfect Formula Pink Gel Coat as I'm testing it out
- Base nail colour. This is the shade that goes over the entire nail, I'm using Formula X Thrilling, a pale grey pink nude.
- Your heart colour. I went for classic red, and chose NYC Times Square.
- Your favourite top coat. I'm trying out Perfect Formula Gel Coat.
- A double ended dotting tool. Mine is from Essence and was a whopping $1.99!
- Acetone (or your nail polish remover of choice, I like Acetone because it works super fast). This one is Onyx Professional.
- A synthetic fine brush to clean up around the nails and cuticles with your acetone. You may not need this or the remover if you're a complete boss at painting your nails. I am not.
WHAT TO DO:
-Start by painting on a layer of your base coat, followed by as many layers of your base nail colour you need to get a nice even finish. I used a creamy pink grey colour, but you could go wild and do ombre nails, glitter or whatever floats your boat. Get creative!
Make sure you let your base nail colour dry before this next step.

-Take your dotting tool and use the larger end to make three little dots on your nail wherever you want your heart to me, with your heart coloured nail polish.

-Then while the polish is still wet, use the smaller end of your dotting tool dipped into more polish to fill the gaps between the three dots and make the bottom end of the heart slightly more pointed. It's important to do this while the colour is still wet so that it blends nicely and doesn't look patchy.
-Be as patient as you can and let that heart dry fully before painting over top with a base coat.
-Repeat on the next nail, or next place you want to paint a heart.
-Take a picture of your nails and tag me on in it on instagram if you use this tutorial, I'd really love to see it!
I hope you enjoyed that very simple but pretty nail tutorial! Happy Valentines!


