Winged eyeliner, or a cat eye/feline flick as it's also known, has to be one of the trickier techniques to nail when you're learning makeup. We've all seen that meme floating around about trying to make one eye match the other until you get to the point of total blackout. It's those famous last words, "I'll just add a little more to this side to even them out..." (15 minutes later, and now your winged liner can be seen from space...). Today's post is a collection of products/tips that I use to get my wings flying even (see what I did there?) every time, sans panic induced hold-your-breath-and-go-for-it application.


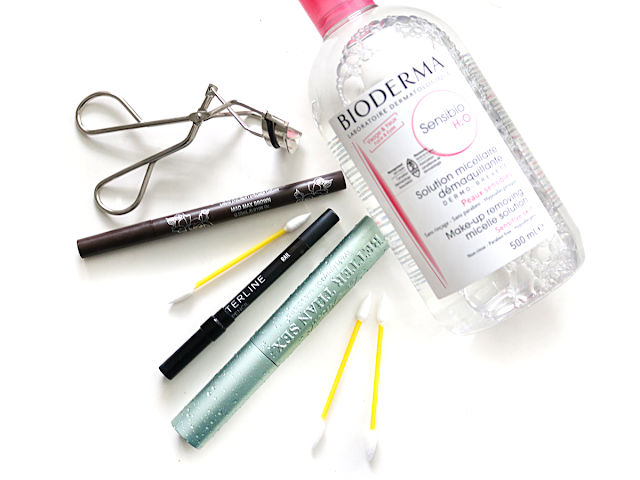
I love the look of a little flick of eyeliner on me; My eyes look more almond shaped and less round with it and I think it accentuates my best feature: my long eyelashes. Getting both eyes to look identical and not like I scribbled it on with my left had however can be a challenge. Over the years I've come to rely on six products/tools to help me get there and these are the steps I take each time:
Start by Tightlining
If you're unfamiliar, tightlining is just like waterlining - except under the top lashes instead of the bottom. As far as I am concerned, this makes the whole look complete as it really gives the intensity at the lashline that makes the lashes look thicker. It also eliminates any unsightly gaps that make your cat eye look half assed.
My go to product for tightlining: Urban Decay 24/7 Waterline Eye Pencil in Rail* (a dark blackened brown that I prefer because it does more for the green in my eyes than black does!)
Meeting in the Middle
Everyone has a different method for how to actually apply the liquid/gel liner, but I prefer the meet in the middle method. I start in the inner corner and draw along the top lash line almost to the edge of my lashes but falling short. I then start a new line from the edge of my bottom lashes upwards towards my temple, however long I want my wing. (I know often the rule of thumb is to direct towards the tail of the brow, but if you're like me and your brows are shorter, that would create a pretty strong lift!). Then a few millimeters from the top point of my wing, I start the liner again, bringing it in towards the lash line again.
My go to product for the sharpest wings: Kat Von D Tattoo Liner in Mad Max Brown
If I have a bit of a boo-boo, or one wing needs a bit of 'crisping' up, I reach for micellar water over makeup remover as it erases away mistakes the first time without muddying lines and leaves no residue. I use really pointed cotton buds to clean up edges - the sharper the point, the better the precision!
My go to products for cleaning up: Bioderma* (classic!) and I trust nothing other than Nail Tees, which have the best points (I've tried others, and nothing compares)
Curl Not Negotiable
If you're going to go to the effort of rocking winged liner, then skipping the eyelash curler is a definite don't. You've finally gotten the perfect cat eye, and curled lashes will frame it perfectly accentuating your eyes even further. Unless you're one of the lucky ones who has naturally lifted lashes (seriously, you're blessed friend) then a lash curler takes your eye makeup to the next level.
My go to product for the longest lasting curled lashes: Shu Uemura's Lash Curler
Buildable Mascara
Don't even think about applying a natural barely there mascara with winged liner! A bold liner choice needs the backing of voluminous lashes. I love a volumizing formula that builds so that I can get it right into the roots and further accentuate the look I am going for. An extra coat on the outer lashes will help compliment the flicked liner perfectly.
My go to product for dramatic lashes: Too Faced Better Than Sex Waterproof Mascara*

What's your favourite tip for getting perfect liner every time? Do you find it easy or difficult to pull of this sort of look on your own?
Shop The Post:
Shop The Post:


